logo

Showing posts with label april rhodes. Show all posts

Saturday, May 7, 2016

Derby Day Riding Peplum

Hey y'all! Happy Derby Day! While I'd like to be sipping a mint julep in a sunny garden right now, I'm on my couch, curled up in my newly completed aperture quilt (post to come soon!) about to watch some movies with my husband. But earlier today, I was (unintentionally) dressed in my derby best because I wore my Riding Peplum to run some errands.

My husband bought me the April Rhodes' Riding Peplum pattern in my Easter basket this year (best. husband. ever.) and I just got around to sewing it. The pattern comes together quickly and easily - definitely doable for beginners, and in fact, is a great introduction to sewing darts. They're not as scary as they seem!

I used Paper Cuts in Dusk from the Cotton + Steel Bluebird collection for my peplum. Initially I wanted a lightweight garment fabric, but at the time I went to buy fabric, there weren't any voiles really calling to me. I love the color dusky plum, and thought it was spring-appropriate. I was right, because paired with my dusky pink pants and pink flats, I felt like I should be out betting on the ponies!

Thanks to my husband for taking a few quick pictures of me prancing around in our backyard, and thanks to Stefanie (Finchette photographer) for taking a photograph of me outside of Finch this morning!


Pattern: April Rhodes' Riding Peplum
Size: Large
Adjustments: None

Monday, February 16, 2015

Tilly and the Buttons Coco Dress

How often does it happen to you that you see a garment pattern and feel ambivalent about it, until you see it on someone and immediately you change your mind?


The Coco Dress was one of those patterns.  Not that I didn't like the look of it - I thought it was adorable - but I didn't think it would work well on me.  Until I saw it on Lisa at the Finch Makers Retreat.  The fabric she used (Gust of Leaves in silver from April Rhodes' Wanderer collection) and the way she styled it was perfect.  So I copied her.  Obviously I'll have to coordinate with Lisa whenever I wear it to Finch events, but it's a small price to pay for a versatile, comfy dress.

It's kind of similar to the Moneta Dress in both look and construction, however the Coco has a less defined waist.  This is part of the reason why I didn't think it would work on me, however when Lisa styled hers with a belt, it was a duh moment for me.

The construction was simple, and Tilly's pattern was easy to follow.  The dress came together quickly the other evening after I had spent the night before tracing and cutting.  When I traced the pattern, I used the slice and spread method to add two inches to the length of the dress.  The original length would have been fine as a tunic but way too short for a dress, at least for a 31-year-old.  (Keep in mind though, I'm 5'10", so for a lot of you reading this, the pattern as it is will probably be perfect no matter what your age.)

The only other part that I changed was making the 3/4 sleeves a little shorter so that they are half sleeves.  I've come to learn that 3/4 sleeves are not flattering for me, but half sleeves are.  Funny how just that little alteration can really change the way a top looks.

As you can see in my awkward pictures below where I pretend that I know how to pose like those fashion bloggers do, I styled my dress with jeggings and boots, a belt, and a cardigan.  As it gets warmer this spring, I'll be able to wear it with sandals for a totally different look.  Also I apologize for my ratty looking hair.  It gets cut tomorrow!


Version: Dress
Size: 5 (oh sweet baby Ray's, this doesn't mean I'm an actual size 5 - it's just the 5th size on the chart)
Alterations: Shortened sleeves from 3/4 to half sleeve; lengthened (slice and spread) dress by two inches.
Photos of me by Beryl Young; Photos of the coffee shop by me

Thursday, February 12, 2015

April Rhodes' Popover Poncho

Winter is pretty much halfway over, which is promising, yet we still have a fair amount of cold to get through before spring arrives.  But hooray!  At least I have sewn my first outerwear piece with plenty of time to wear it before the weather gets too warm for wool!


For my project at the Finch Maker's Retreat (more on that later), I chose April's Popover Poncho pattern because it was cute (I'd been admiring the shop sample for awhile), and because I knew I'd need something that didn't require a lot of concentration.  If the retreat was going to be anything like a Friday Night Sewcial or Sip & Sew, I'd be doing a lot of wandering and chatting.  Hard to get much done in that case.


Also bonus, because April Rhodes was the guest teacher at the retreat, she was able to help out when I made a few mistakes (like totally forgetting to fold the pattern in a bit before placing it on the fabric fold - this will probably only make sense if you've made this poncho).  

I was also glad I chose to make this pattern at the retreat rather than at home because sizing had me confuddled.  So remember: when measuring, instead of your typical bust-waist-hip measurements, you'll be measuring around your shoulders and then, keeping your arms at your sides, around your bust and arms at once.  


I am what Cosmo and Glamour and other women's magazines call 'pear shaped', meaning that my shoulders are narrow and my hips are wide and just right for birthing, which is a waste because I'm not birthing anything anytime soon.  So despite my waist and hips usually falling into a larger size, the point was moot as my shoulders are a solid size small.

However, I am tall and instead of having model-length legs, I was blessed (sense the sarcasm) with an extra long torso.  Like, when my husband (who has a few inches in height on me) sits down next to me, I look like an amazon.  It's... awkward.  Anyway to remedy that, I traced out the size small width all the way down to the plus size length.  The size ended up being perfect!

The pattern came together pretty easily.  If I weren't too busy popping around the room to see what the other girls were working on, I'd have probably been done quicker.  But start to finish - including measuring, tracing, and cutting - it was done within a day.  I chose this specific wool fabric because I felt like it was a bit more casual, which suited me well.  And although I toyed around with a fuzzy fleece for the cowl lining, I ended up with this soft knit, which feels cozy.  I think wool would have been too itchy, so keep that in mind when choosing your cowl lining fabric.


The only changes I would make next time would be to choose a darker binding, and to lower the pocket so it's in a more natural position since I lengthened the pattern.  But because I forgot to do that, the bottom of the poncho flips up when I put my hands in the pocket, revealing the (sloppily applied) binding underneath, which I made using Crocheting in Clouds from April's new Wanderer line.  It's a beautiful pafabric, but now I think a simple black bias tape would camouflage the flipping of the bottom when I use the pocket, which wouldn't have actually been a problem had I thought to lower the pocket in the first place.  A vicious circle.


Oh, and something I might do is hand sew a pocket on the inside because why not?  I'll update this post if I ever get around to doing that.


The Popover Poncho is a great pattern.  It's my first time using one of April's Patterns, and it's well-written and easy to follow.  I've been getting so many compliments on it, including some nice comments from two older gentlemen in the coffee shop as I write this post.  Additionally, April is a complete doll, and it was fun getting to chat with her at the retreat this past weekend.


Fabric: Wool print; coordinating knit - from Finch Sewing Studio
Pattern: The Popover Poncho by April Rhodes
Size: Small
Alterations: Traced out the size small with the length of the 'plus' size poncho
Photos taken at Finch Sewing Studio by me; Photos taken of me by Beryl Young.  Thanks Beryl!

If you're in the DMV area, take the Popover Poncho class at the Finch!


Thursday, July 3, 2014

Colette Zinnia Maxi Skirt

I've been itching to make a maxi skirt for some time now.  I knew a knit version would be simple and quick, but I was imagining something in a flowy light fabric, like a voile.

I also knew that a maxi skirt would require a lot of fabric and given that voiles tend to be more expensive than regular cottons, I kept putting it off.  But last weekend my husband went out of town to visit his brother for some boy time, so I stopped in to Finch to browse.  Yeah, browse.  That's what I told myself, anyway.  An hour later I walked out of there with three yards of April Rhodes' Arizona voile, the Colette Zinnia pattern, and white cotton fabric for a lining.


I spent the rest of the day trying to figure out the best way to convert the Zinnia (Version 3) into a maxi skirt.  In the end, I did the slash-and-spread method, but it took awhile to determine the best way to do it.  Should I extrapolate the A-line from the top of the skirt down to the bottom, making a wide-ass hem?  Or should I draw a line from the end of the top part of the skirt down to the bottom of the skirt?  I opted for the latter, but I did a lot of researching online to make sure my skirt wouldn't end up with too tight a hem circumference making me walk like a Mermaid or something.

The Zinnia pattern sewed up easily once I got all of the specifics out of the way.  I went up a size so that it would be a little looser around my waist - I am high waisted with a long torso, so when something is designed to sit on the natural waist, it ends up being really high.  I wanted this to sit more toward my belly button, so I measured this area and sized for it rather than my natural waist.  This worked out pretty well.

My only gripe about this last-minute skirt that I sewed is that the cotton fabric I used for a lining is too thick.  It's a quilting cotton, so paired with a fabric as light and flowy as a voile, it practically feels like canvas.  It'll be too much effort to take the skirt apart and swap out the cotton for something lighter/drapier, though.

I was up until 1:30 in the morning working on this skirt, and the only reason is because I had planned to wear it that day (Sunday morning) to an event  I was attending - Blog Brunch DC.  Head on over to my photo blog to read more about it.  Trust me, you want to!


Pattern: Colette Zinnia
Fabric: April Rhodes' Arizona Voile (Triangle Tokens)
Alterations: Converted into maxi skirt.  Used V. 3, but gathered rather than pleated.
Photos: By Nicole outside of her shop!

Monday, June 9, 2014

Everyday Skirt • Featuring April Rhodes' Arizona

I have to assume that at some point, after I make a certain pattern a few times, I won't need to post text with the photos because there won't be much to say about it.

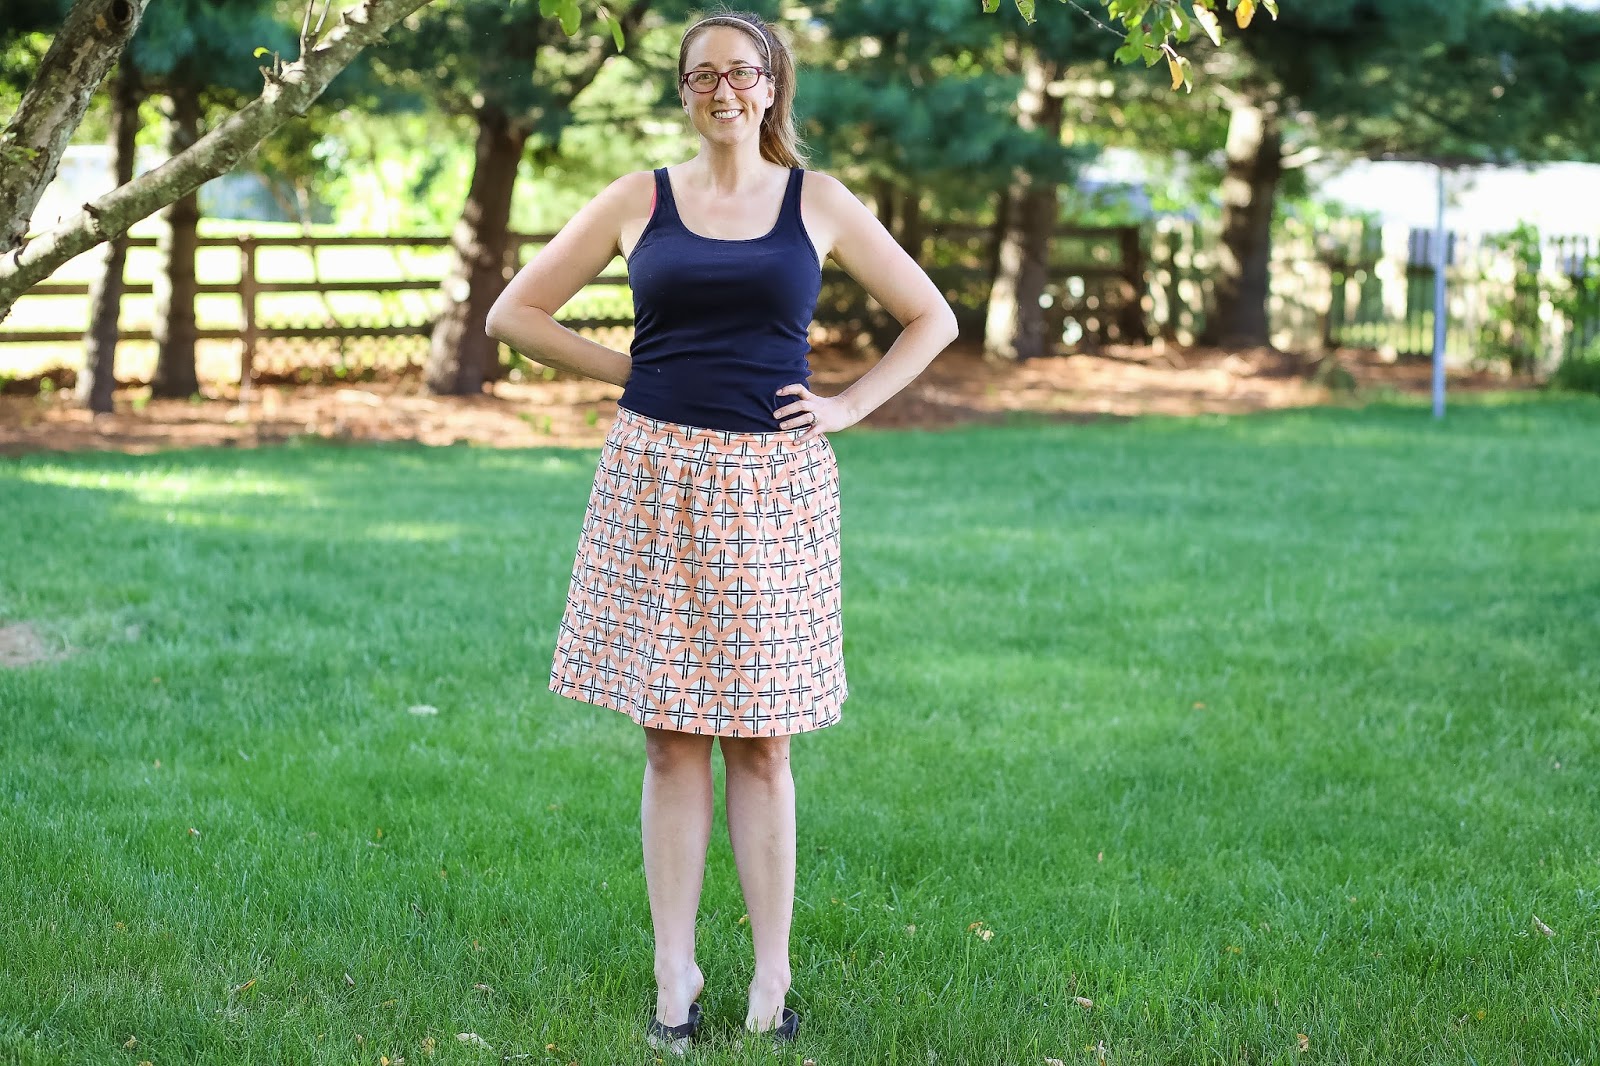
The Everyday Skirt is probably going to be the first of those patterns.  It's what I'm calling my summer staple this year, and I have only two but plan to make loads.  Comfortable enough to throw on with a tank top and be good for the day, but also cute enough to be worn out to dinner with sandals and a cute necklace.

But for now, I'll say a few more things about the making of this skirt.  First, I still maintain that it's super easy and quick.  Since I like to cut my fabric in batches (I have several garments to sew up that are already cut and ready for me), the Everyday Skirt can be sewn together in a morning.  It's as close to instant gratification that you can get in garment sewing, I think.

Secondly, I decided to shorten it a bit from the original pattern, and it's still plenty long enough.  Excellent.

The last thing to say is that I adore this Clay Sundot fabric from April Rhodes' Arizona collection.  I stocked up on some yardage from this collection to sew a few things.


On to my awkward model photos in which my skirt is actually crooked:


Pattern: Everday Skirt by Liesl + Co
Fabric: Clay Sundot from April Rhodes' Arizona collection
Size: Medium
Alterations: Shortened the hemline a bit